
This tutorial walks you through that process from scratch, covering the steps that apply across most AI voice platforms today, from basic text-to-speech to voice cloning to calling an API if you’re building something more technical. If you’re looking for the best AI voice generator, these steps will help you get started. By the end, you’ll have a reliable, step-by-step approach for working with any interface you encounter.
Getting Started the Right Way
Create Your Free Account
You don’t need to install anything to get started. Most AI voice generators run entirely in your browser, and signing up usually takes less than a minute with just an email address. Nearly every major platform offers a free tier so you can test the voice quality before committing, typically giving you between 5 and 20 minutes of generated audio per month.
That’s enough to explore the interface, try a few voices, and decide whether a platform’s voice quality actually fits what you need.
Get to Know the Dashboard
Once you’re in, don’t dive straight into generating audio. Take 60 seconds to look around. Most platforms organize themselves around the same core areas: a main text-to-speech workspace where you type or paste your script, a voice library where you browse and preview available voices, and a history or project panel where past generations are saved. Knowing where these live now saves you from hunting around later when you actually need them.
What Do Free and Paid Plans Offer?
This detail is more important than people often realize. With most platforms’ free plans, you can generate audio and test the voice quality, but commercial use is typically restricted, and voice cloning is generally available only with a paid subscription.
If you’re just testing the waters, the free plan is fine. But the moment you want to publish something for clients, YouTube, or any monetized project, you’ll need to check the specific plan’s commercial usage terms.
Generating Your First AI Voice
Format Your Script for Natural Pacing
This is the single biggest lever for making AI speech sound human, and it has nothing to do with settings. It’s about how you write the text. Short sentences, proper punctuation, and natural paragraph breaks all give the model cues on where to pause and how to pace itself.
A wall of text with no punctuation will come out sounding rushed no matter which voice you pick. Writing in a natural, narrative style, the same way you’d write dialogue in a story, genuinely changes how the pacing and emotion come through in the final audio.
Match the Voice to Your Content Type
Not every voice suits every script. For example, a calm, steady narrator won’t work for an energetic product ad, and an upbeat, fast-paced voice can seem out of place in a documentary. Before choosing, explore the voice library by tone, accent, and style, and preview several options with your actual script.
Don’t just settle for the first voice that sounds good by itself—make sure it matches the content and context. Since voice quality is genuinely subjective, the only reliable test is to run the same short passage through two or three voices and listen for which one actually fits.
Understand Stability, Similarity, and Speed Settings
After choosing a voice, you can use the sliders next to it to fine-tune its sound. The speed setting usually starts in the middle, letting you slow things down for a more relaxed delivery or speed them up for extra energy—just keep in mind that going too far in either direction can lower the audio quality.
Stability or “similarity” settings adjust how much the voice sticks to a steady, predictable style versus how much it adds emotional variation.
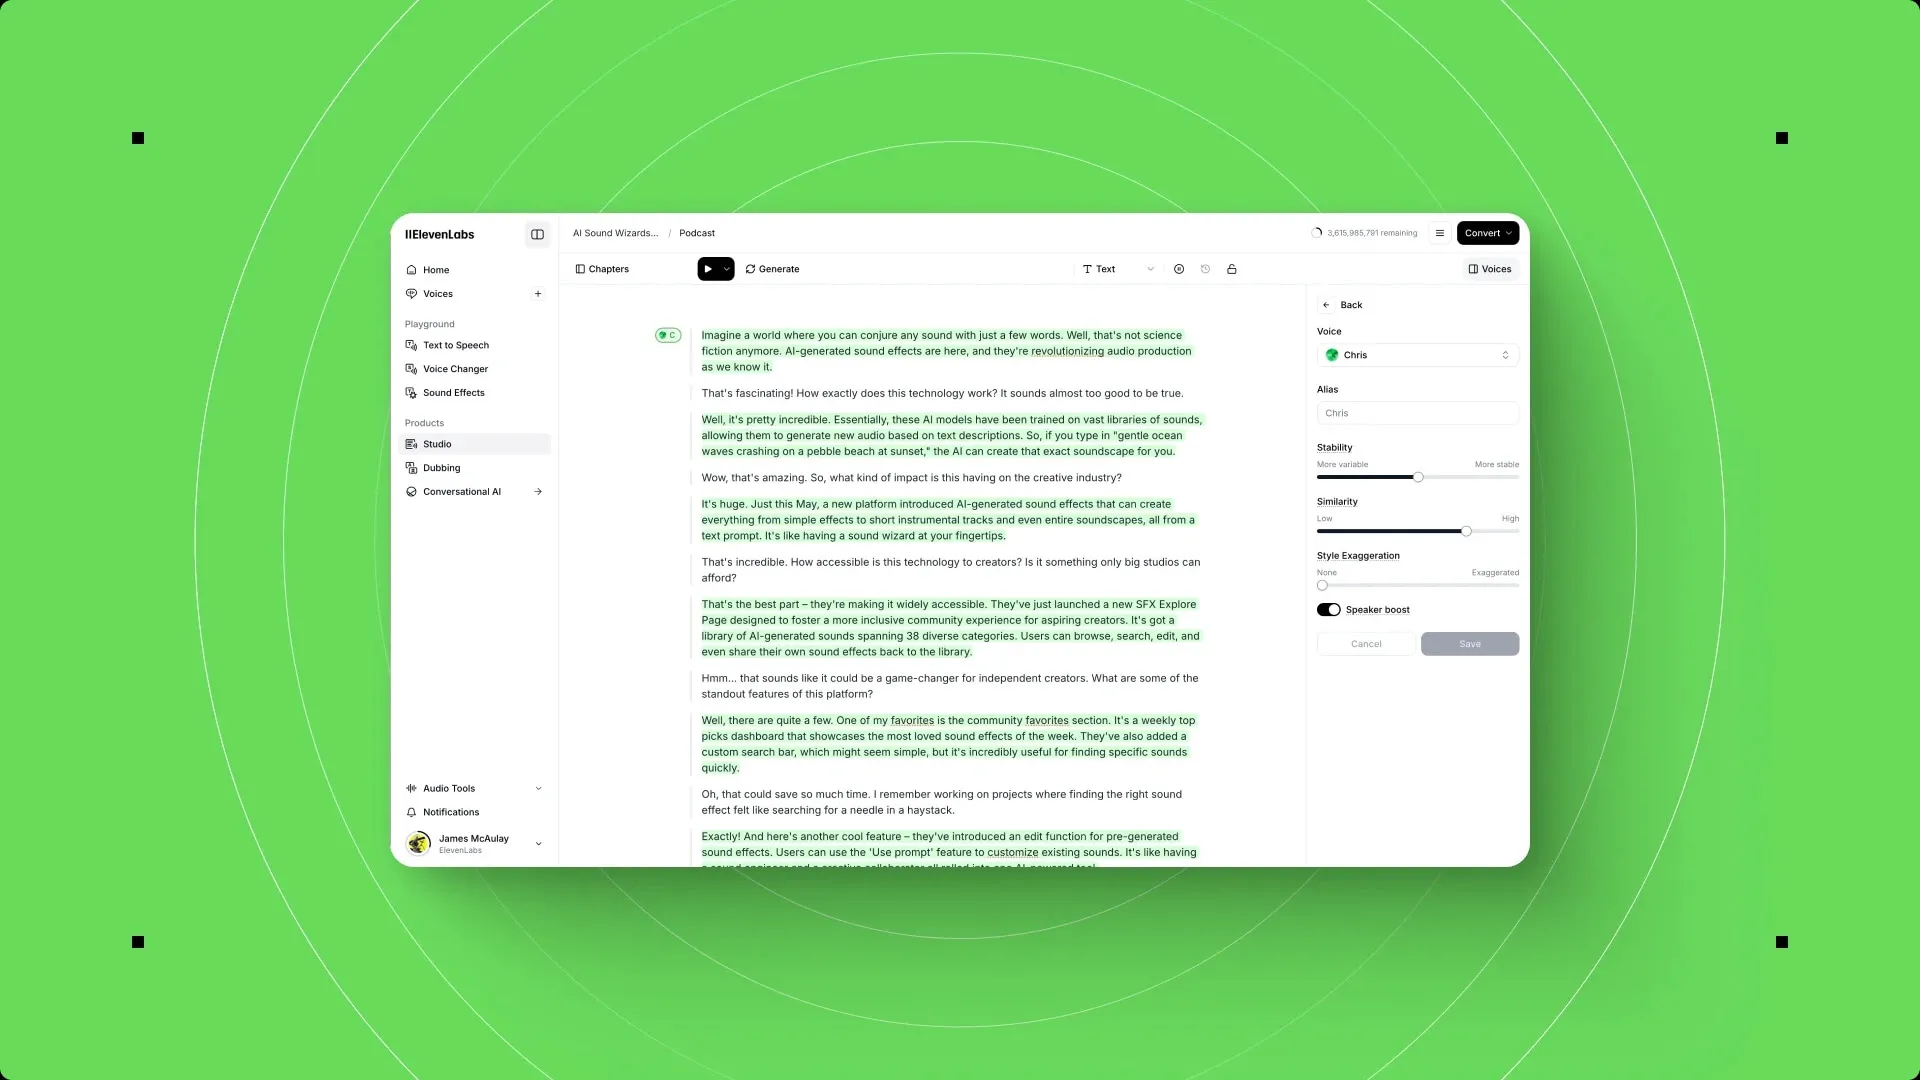
Although each platform uses slightly different names for these settings, the main goal is always the same: adjusting stability, expressiveness, and pacing.
A more expressive setting gives the voice more life but might also lead to unexpected results, while a stable setting ensures consistency but can make things sound a bit flat. If you’re new to these tools, it’s best to start with the default middle setting and experiment gradually to see how each slider changes your script.
Going Beyond Basic Text-to-Speech
Cloning Your Own Voice (Instant vs. Professional)
If you want your content to actually sound like you, voice cloning is the solution. Most platforms offer two kinds of cloning: a quick, “instant” option that uses a short audio sample—usually just ten seconds to a couple of minutes—to create a usable approximation, and a more advanced, professional-grade method that needs longer, high-quality training audio for a much more accurate, natural result.
If you’ll be using a cloned voice frequently, such as in a podcast intro or for consistent video narration, investing the time in the more advanced process is usually worthwhile. One thing to remember: reputable platforms require clear consent before allowing any voice to be cloned, and doing this without someone’s permission is not only unethical but also illegal in many places.
Designing a Custom Voice From a Description
Sometimes you don’t want your own voice or a stock voice. You want something invented, a character for a game, or an audiobook narrator with a specific personality. A number of platforms let you generate an entirely new voice from a written description alone; you describe the age, gender, accent, and tone you’re picturing, and the tool generates a handful of voice previews for you to choose from.
It’s a genuinely useful option for creative projects where no existing stock voice quite fits what you’re picturing.
Dubbing and Translating Existing Audio/Video
If you already have a video or audio file and need it in another language, dubbing tools handle translation while preserving the original speaker’s emotion, timing, and tone. Better implementations separate each speaker’s dialogue from background music or sound effects, so the translated version doesn’t lose the soundtrack beneath it.
Language support and upload limits vary widely across platforms, so it’s worth checking the specifics before you commit a long video to the process. It’s also common for free-tier dubs to come out watermarked, while paid tiers remove that.
Using the API for Developers
Getting Your API Key
If you’re building an app, automating a content pipeline, or just prefer working in code, the API is where that happens. Your API key typically lives in your account’s dashboard or settings page. Once you have it, the standard practice is to store it as an environment variable rather than hardcoding it directly into your script, both for security and to prevent exposure if you share your code.
Sending Your First Request (Text-to-Speech via API)
After installing the relevant SDK for your programming language, generating speech from code is usually as simple as writing a short script. The general pattern across most providers is the same: load your API key, then send a request containing your text, a chosen voice ID, and a model selection, and you get back playable audio. It’s a small amount of code for what used to require studio time and a microphone setup.
Choosing the Right Model (Quality vs. Low-Latency)
Not all models are built for the same job, and most platforms now offer more than one. A higher-quality, more expressive model usually suits projects where emotional nuance matters most, such as narration or character voices, but often comes with a shorter character limit per request and slightly longer processing time.
A faster, lower-latency model trades a bit of expressiveness for speed, making it the right pick for real-time applications like voice agents or live captioning, rather than pre-recorded content. Picking the right one is less about which is “better” and more about matching the model to what you’re actually building.
Habits That Get You Better Results Every Time
Listen Critically and Know When to Regenerate
Don’t just check whether the audio “sounds okay.” Listen for where pauses land, whether emphasis falls on the right words, and whether the emotional tone matches what the text is actually saying. If something feels slightly off, regenerating is normal, even for people who do this daily. Treat your first generation as a draft, not a final answer.
Save Your Best Settings Combo
Once you land on a stability, speed, and voice combination that sounds right for your kind of content, write it down somewhere. Consistency across multiple projects, especially if you’re producing regular content like a podcast or course, depends on being able to reproduce the same setup instead of guessing each time.
Test Short Before You Scale Long
Before you paste in a 3,000-word script, run a short 100 to 150-word sample first. It’s faster to catch a pacing or pronunciation issue on a short clip than to discover it halfway through a 20-minute generation.
It’s also worth knowing that even the best AI voice generators tend to lose consistency on long-form content past roughly 20 minutes, so breaking longer projects into shorter generated segments—as opposed to running everything as a single giant run—usually produces a more even result. Confirm the voice and settings work on a short test, then scale up once you’re confident.
Now It’s Your Turn
You now have an actual process to follow, providing clarity as you navigate the interface. If you’re looking for a specific platform to put this into practice, ElevenLabs is a solid place to start, widely regarded as one of the most natural-sounding options available.
Try ElevenLabs for Free →
Digital Marketer, SEO Enthusiast
Authored by Abu Talha, who founded Sembron.com and enjoys diving into the world of SEO, software, and AI technologies.